Hanging Wooden Slice Art: Nature’s Canvas Awaits
Transform your walls with the rustic elegance of wooden slice art! These circular canvases hold endless creative possibilities while bringing nature’s warmth indoors.
I still remember my first wooden slice creation—a maple round adorned with watercolor mountains. The piece now hangs proudly in my studio, reminding me of nature’s perfect imperfection.
At Silent Balance blog, we’ve experimented with dozens of techniques, from pyrography to resin coating. The symbolism of trees runs deep in each creation—representing growth, wisdom, and connection.
Remember: wood breathes. Let it.
Small slices work best for beginners. Trust me.
The bark edge? Keep it for character.
From Forest Floor to Living Room Wall: My Journey
Last autumn, a windstorm toppled my neighbor’s birch. Rather than mourning the loss, I salvaged several perfect sections. Working in my garage with the scent of fresh wood filling the air, I created a five-piece constellation map for my daughter’s bedroom. As I sanded each slice, I couldn’t help but trace the growth rings with my finger—each one a chapter in the tree’s silent story. Now when she points to her wooden stars at bedtime, I’m reminded how beauty persists even after the storm passes.
Quick Takeaways
- Choose wood slices with responsible sourcing, optimizing for both aesthetic appeal and environmental integrity in your decor.
- Use painter’s tape to create clean lines and geometric patterns, ensuring precision in your artwork.
- Arrange slices at eye level and in a gallery style to capture attention and create a conversational piece.
- Regularly dust and maintain your artwork, reapplying sealants to preserve vibrancy and protect against moisture.
- Embrace and celebrate natural wood imperfections to add unique character and stories to your hanging art.
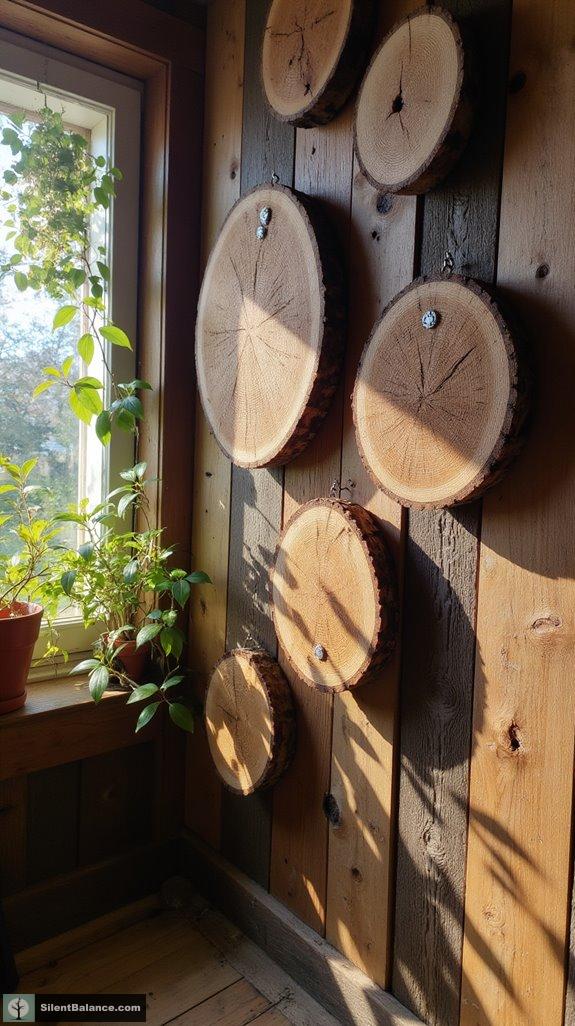
Selecting the Right Wood Slices
When you’re diving into the world of wood slice art, selecting the right slices is like choosing your paintbrush—it’s essential for creating something special!
Think about the wood types you want to use. Hardwoods like oak and walnut offer that lovely durability, while softwoods like pine show off charming grain patterns. Interestingly, some trees exhibit unbelievable growth patterns that can inspire unique art concepts.
Consider the wood types carefully: durable hardwoods like oak and walnut versus the charming grain of softwoods like pine.
Rustic or modern, what vibe speaks to you?
And don’t forget to contemplate thickness! A half to one inch makes hanging easy, but don’t skimp on surface quality. Smooth slices invite creativity, while natural imperfections tell unique stories. Additionally, consider using sawtooth hangers for lightweight pieces, which are often affordable and easy to install.
Plus, selecting responsibly sourced wood honors nature’s strength—what better symbol for your home decor?
Let every slice reflect your story, blending beauty with meaning!
Preparing Your Wood Slices for Painting
Ready to bring your wood slices to life? First, let’s focus on moisture retention to guarantee your artwork lasts. You can oven-bake those wood slices at low heat for 20-30 minutes to kill any pesky bugs and dry them out. Incorporating minimalist wood slice wall art into your decor can create a unique and cozy atmosphere.
Here’s a quick guide for your surface preparation:
| Step | Details |
|---|---|
| Check for moisture | Make sure they’re fully dry |
| Sanding | Use 220 grit sandpaper |
| Bark removal | Peel off unnecessary bark |
| Cleaning | Wipe away dust with a dry cloth |
| Sealing | Apply a primer or sealer |
Following these tips helps paint grip better, enhancing that beauty you’re aiming for. Don’t skip this prep—it’s essential for a smooth finish! What will your wood slices become?
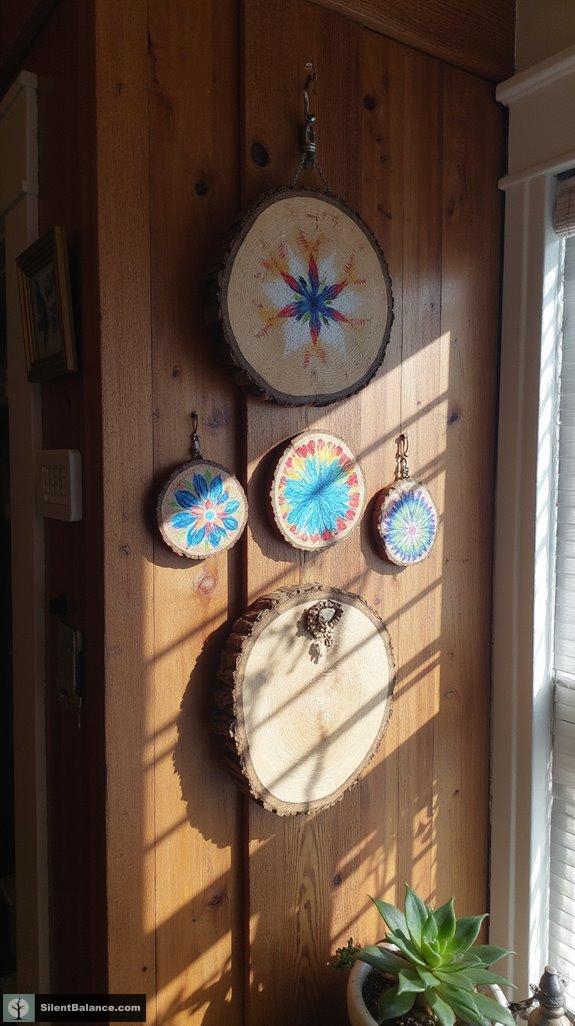
Painting Techniques for Unique Designs
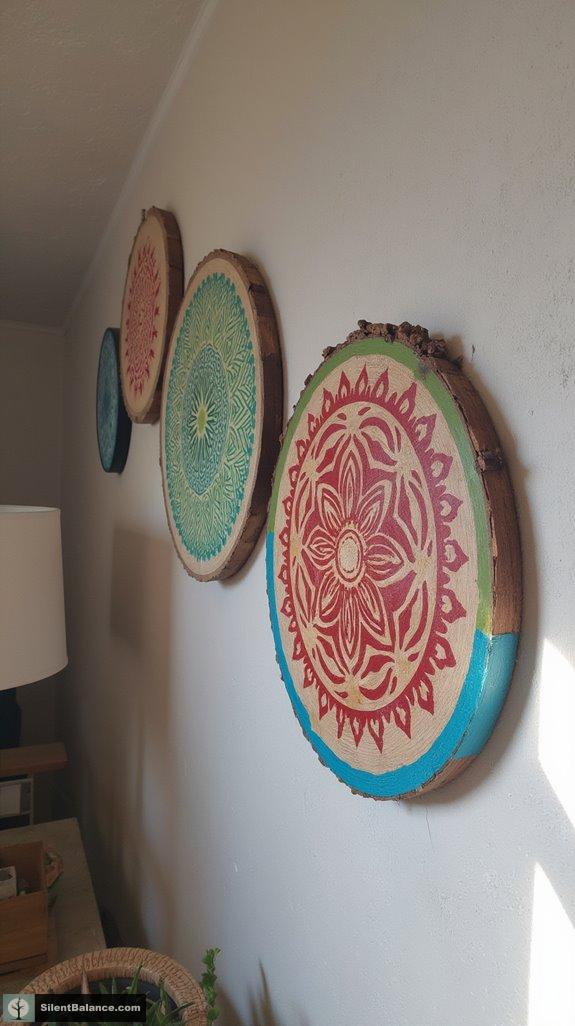
Get ready to release your creativity, because painting on wood slices opens a world of enchanting possibilities!
Imagine using layering techniques to build depth in your design—just let each layer dry completely before adding the next one. It’ll keep your colors vibrant and crisp!
And let’s talk paint blending; mix those hues for stunning effects. You could even use painter’s tape for sharp lines or geometric shapes, adding a modern touch while playing with the wood’s natural charm.
Incorporating Natural Elements
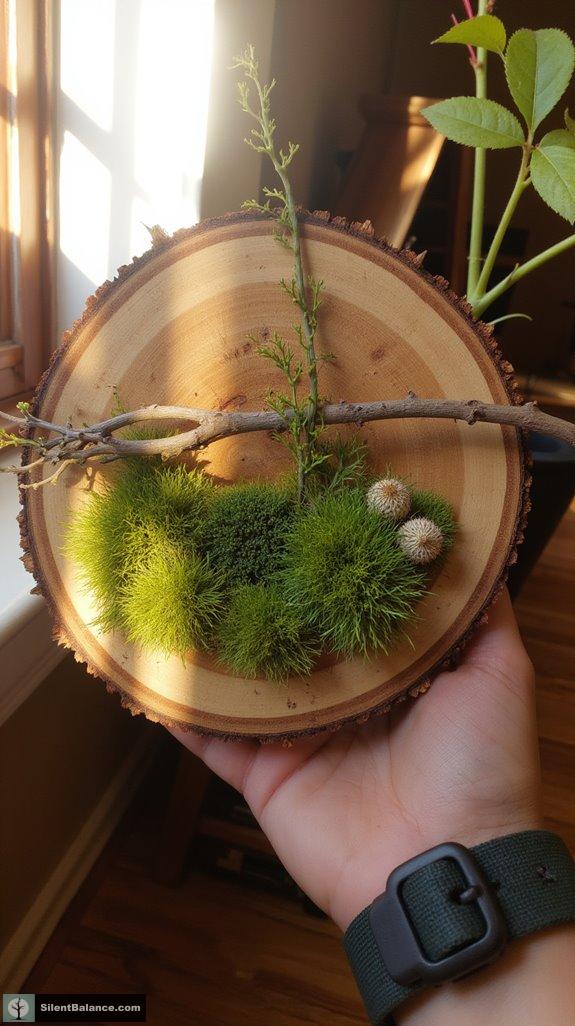
Incorporating natural elements into your wooden slice art can truly elevate your creation, transforming it from a simple craft into a symbol of life and renewal.
Think about adding moss textures for a lush, organic look—it’s like bringing a tiny forest indoors!
Pair moss with twigs or small branches, and you’ll create delightful natural contrasts that draw the eye.
Plus, have you ever noticed how a simple seed pod can tell a story? You might also consider integrating minimalist twig basket displays to enhance your natural art setup.
Creating Geometric Patterns With Tape
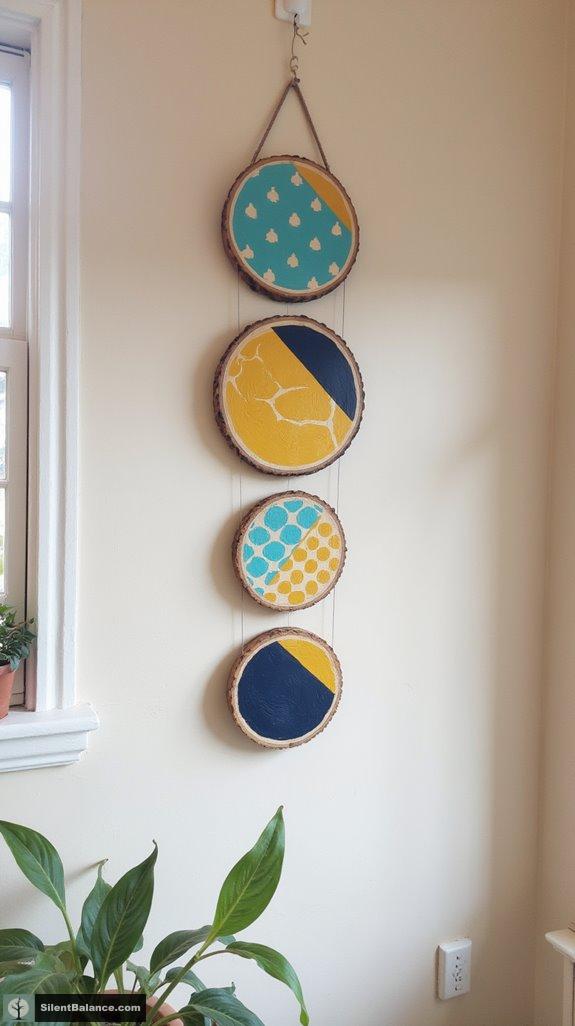
Have you ever wondered how a twist of tape can turn a simple slice of wood into a stunning geometric masterpiece? With a few clever tape techniques, you can channel your geometric inspiration into beautiful creations!
Here’s a quick look at the essentials:
| Step | Tips |
|---|---|
| Choose your tape | Use painter’s tape for clean lines. |
| Sketch your design | Light pre-drawings help guide you. |
| Cut precise shapes | Use scissors or a craft knife. |
| Firmly apply tape | Press down all edges to prevent bleeding. |
| Remove wisely | Wait until paint is dry for crisp edges. |
Get creative and enjoy the process—who knew a little tape could lead you on a journey of growth, strength, and renewal in your decor choices?
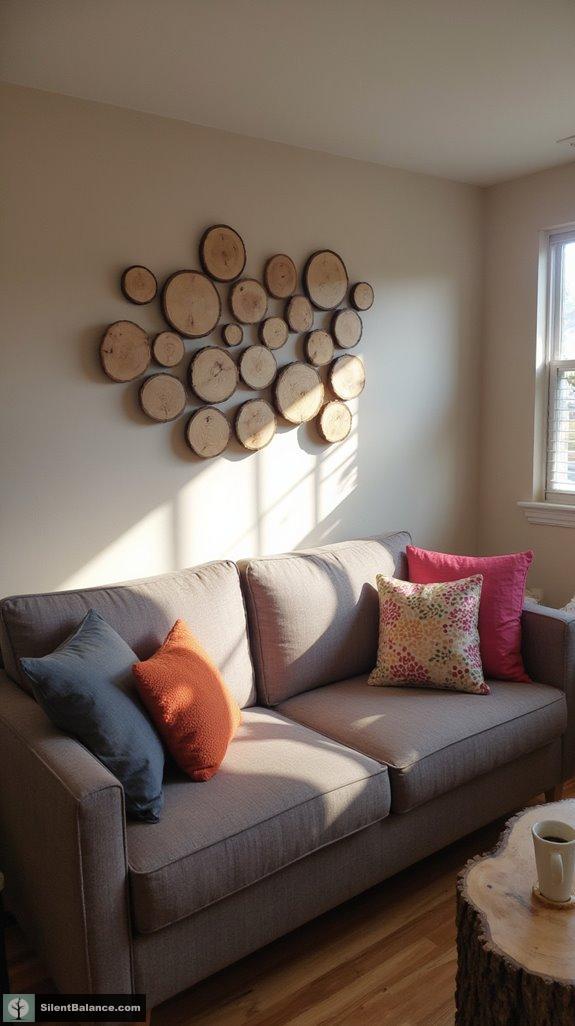
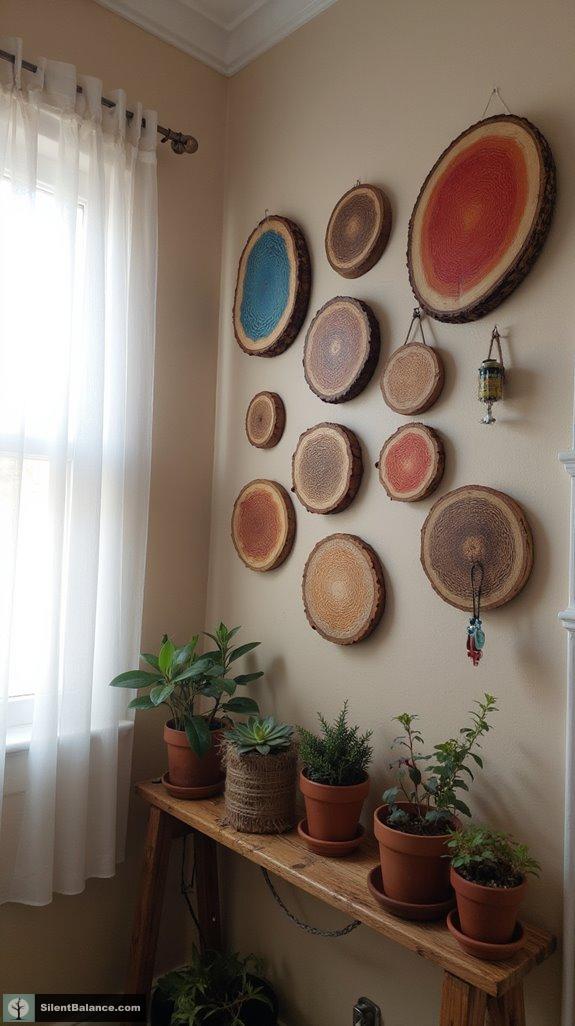
Assembling Slices for a Cohesive Look
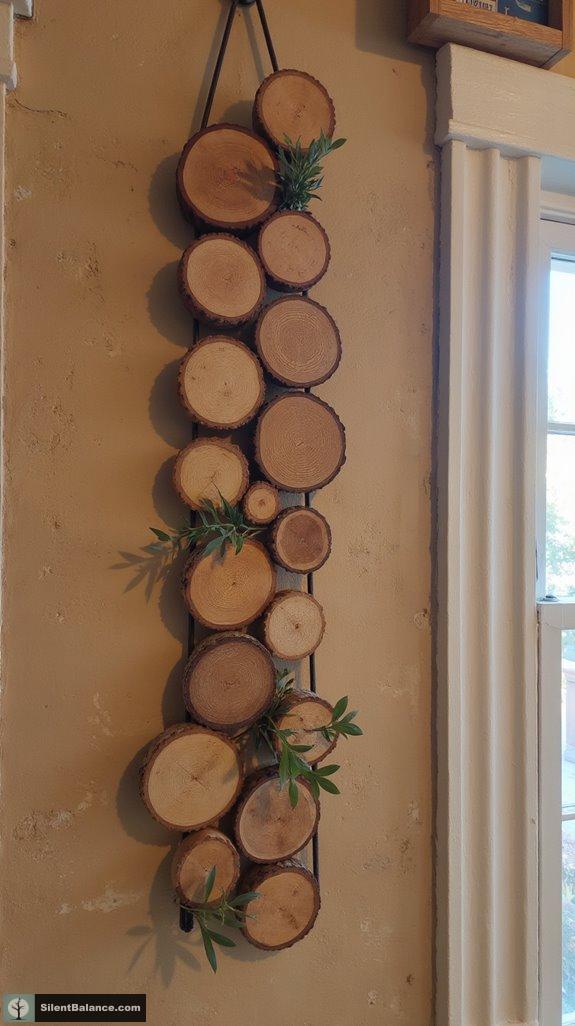
When it comes to assembling your wood slices, a little thought can make a world of difference in achieving a polished, cohesive look.
Start by laying out your slices to experiment with arrangement strategies. This allows you to discover the perfect balance between different sizes and shapes, creating visual harmony.
Don’t overlook natural wood tones—mixing wildly different woods can throw your whole vibe off!
Aim for consistent spacing or intentional clusters so it doesn’t look like a random wood festival exploded on your wall.
And keep in mind, overlapping slices can add lovely depth, making your art pop.
Why not let these beautiful pieces of nature symbolize growth and strength in your home? After all, a little tree magic goes a long way!
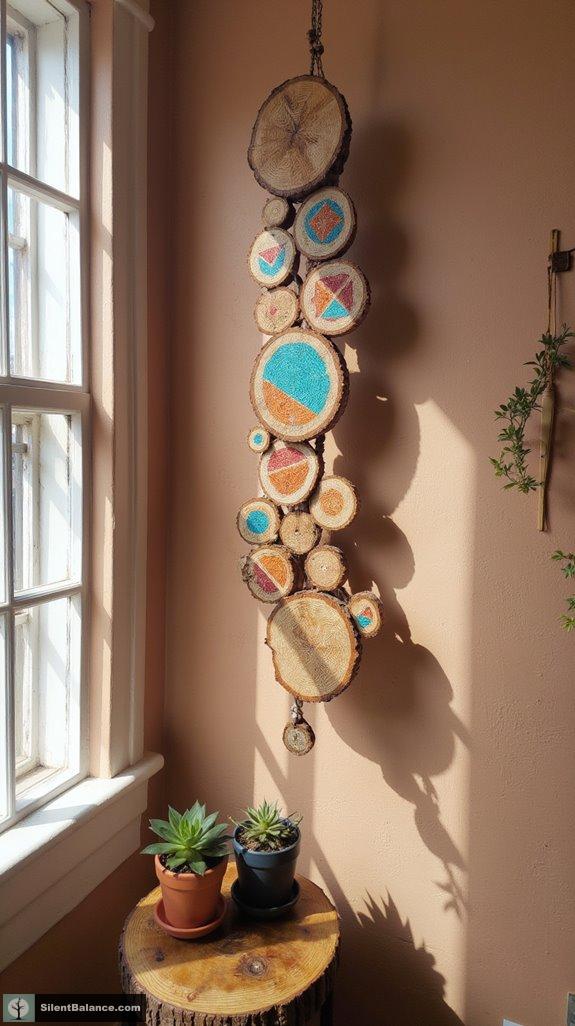
Using Strings and Twine for Suspension
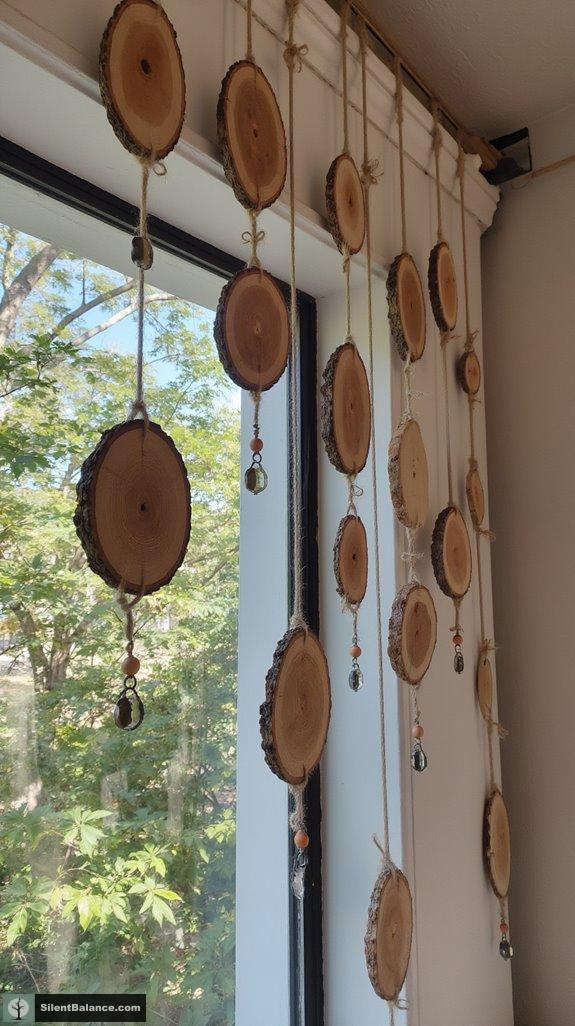
Even if you’re not quite the MacGyver of home décor, using strings and twine to suspend your stunning wood slices can elevate your art from ordinary to extraordinary.
Let’s chat about a few fun ways to get those slices hanging just right!
- Choose natural jute twine for a rustic vibe, or go for waxed polyester cord for extra twine durability and moisture resistance.
- Drill two holes near the top and create a secure loop for hanging, ensuring you’ve tied those knots tight!
- Add personalized touches like beads or accents on your twine for an artistic flair.
Enhancing Artwork With Woodburning

After you’ve nailed down the hanging aspect of your wood slice art, it’s time to amp up the magic with some woodburning techniques.
Think about using graphite transfer paper to sketch your design. Keep it simple — complicated patterns can be tricky!
Softwoods like basswood are perfect for beginners since they burn beautifully.
You’ll want to master heat control for those crisp, clean burn lines that charm the eye.
And don’t forget design inspiration!
Floral motifs or even natural patterns can breathe life into your piece.
By incorporating these designs with a mix of shading techniques, you can capture the essence of nature right in your home.
Let your artwork symbolize growth and protection — isn’t that a beautiful touch?
Caring for Your Wooden Slice Art
Caring for your wooden slice art isn’t just about keeping it pretty; it’s about preserving a piece of nature and the rich stories it tells.
To keep that slice looking good and feeling loved, consider this simple maintenance routine:
- Protect it from moisture: Store it in a cool, dry spot, far from damp areas like kitchens or bathrooms.
- Clean with care: Use a dry cloth for dusting, avoiding liquids that could stain.
- Seal and maintain: Reapply sealants regularly to keep that beautiful wood vibrant and protected.
Each slice reflects a tree’s journey—its strength, growth, and renewal.
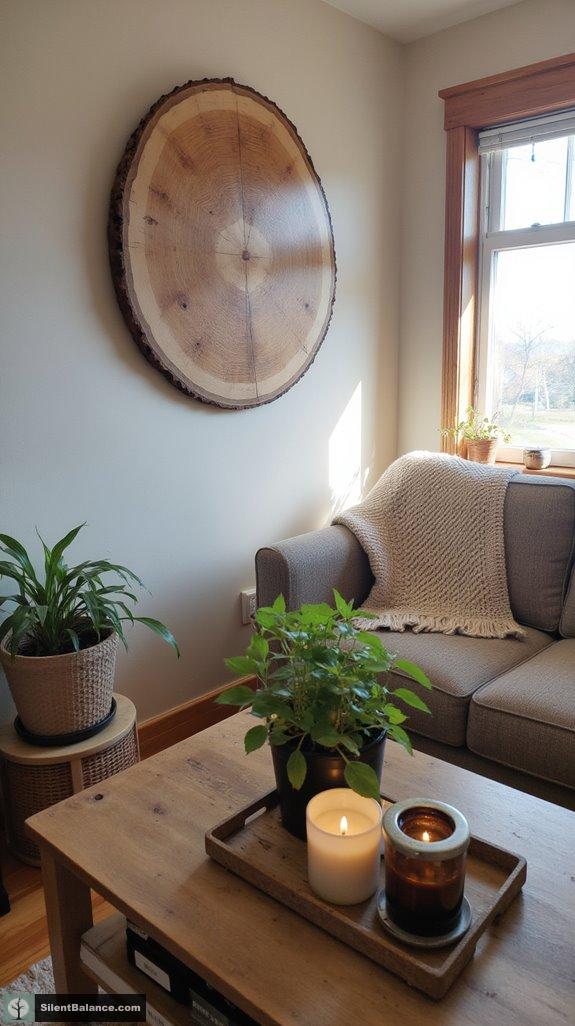
Displaying Your Hanging Installations
How can you turn your space into a natural haven with hanging wooden slice art?
Think about the display height and wall spacing when arranging your pieces. You want to create an inviting atmosphere, right? Hang slices at eye level for maximum impact—after all, who wants to squint at decor?
Consider display height and spacing for a warm atmosphere; hanging slices at eye level ensures they catch the eye effortlessly.
Consider using keyhole or sawtooth hangers to keep your installation flush with the wall, creating a polished look.
And don’t shy away from twisting things up with ribbon or twine; it adds that charming, handcrafted vibe.
Imagine grouping slices in a gallery wall—sparking conversation and connection.
Each wooden piece carries rich symbolism of growth and renewal, inviting a deeper connection to nature in your home. It’s more than decoration—it’s a story!
How to Make Organic Wood Slice Hanging Sculptures
With a little creativity and some simple techniques, you can transform ordinary wood slices into enchanting hanging sculptures that bring the beauty of nature into your home.
By incorporating layering techniques and emphasizing organic balance, you’ll create pieces that captivate the eye and stir the soul.
Consider these tips:
- Embrace imperfections. Select wood slices with natural cracks and varied grains to cultivate a truly unique, one-of-a-kind look.
- Play with paint. Experiment with acrylic, chalk, or craft paints to add vibrant geometric patterns or abstract designs.
- Harness the power of symbolism. Incorporate tree-inspired elements to infuse your creations with deeper meaning and personal significance.
Get ready to elevate your space with these stunning, nature-inspired hanging sculptures.
Nature’s Resilience in Design
While most of us admire beautiful home décor, have you ever stopped to think about the deeper stories your design elements tell?
Using wood in your art embraces nature’s resilience and natural durability. Each knot and grain reveals its journey, carrying stories of growth, strength, and renewal.
Using wood in your creations honors nature’s endurance, with every knot and grain telling a tale of resilience and renewal.
Choosing reclaimed or weathered wood enhances your organic design, adding unique textures and a sense of history to your space. Those natural cracks and splits? They’re not imperfections; they’re character!
Consider incorporating elements like butterfly joints for stability, and let your pieces mirror the flowing lines of tree growth, celebrating the beauty of imperfection.
FAQ
What Types of Wood Are Best for Outdoor Hanging Art?
For your outdoor hanging art, cedar options are fantastic due to their natural insect and decay resistance. Consider using teak or redwood for exceptional durability, ensuring your piece withstands the elements beautifully over time.
How Do I Prevent Paint From Peeling Over Time?
Visualize a flower wilting in the sun—just like that, you’ve got to prioritize surface preparation for strong paint adhesion. Sand and clean your wood well, then seal it; you’ll keep your art vibrant longer!
Can I Use Vintage or Reclaimed Wood Slices?
Absolutely, you can use vintage or reclaimed wood slices! Their unique character and reclaimed charm bring rustic warmth to your space, while those vintage aesthetics make every piece a heartfelt addition to your decor. Embrace their beauty!
What’s the Best Way to Store Unpainted Wood Slices?
“An ounce of prevention’s worth a pound of cure.” To store unpainted wood slices, guarantee proper storage in a cool, dark space with humidity control, avoiding direct sunlight and drafts to maintain their beauty.
How Do I Remove Old Paint From Wood Slices?
To remove old paint from wood slices, use chemical strippers for paint removal, then clean the wood thoroughly. Keep in mind to wear gloves and work in a ventilated space to protect yourself during the process.
References
- https://mountainmodernlife.com/how-to-make-wood-slice-art/
- https://www.infarrantlycreative.net/5-ways-to-craft-with-wood-slices/
- https://www.youtube.com/watch?v=ERPzLkRw5IA
- https://plaidonline.com/inspire-and-create/article/how-to-use-wood-slices
- https://www.youtube.com/watch?v=xSjj8fIimqc
- https://www.woodburncorner.com/burnblog/the-best-hanging-options-for-wood-art-and-pyrography-pieces
- https://www.wayfair.com/keyword.php
- https://www.etsy.com/market/wood_slice_wall_art
- https://modpodgerocksblog.com/wood-slice-crafts/
- https://www.youtube.com/watch?v=EN1iuMiDr4k
- https://www.wetcanvas.com/forums/topic/painting-decorative-wooden-rounds-how-do-i-prepare-and-seal-them/
- https://www.youtube.com/playlist?list=PLE3efgRj77GnmKpEgz3FuSU7cyq1U2Fwm
- https://artistro.com/blogs/news/wood-slice-painting-with-flowers
- https://feelingnifty.com/how-to-paint-wood-slice-ornaments/
- https://hungaricanjourney.com/how-to-paint-wood-slice-ornaments/
- https://www.youtube.com/watch?v=Tn7ZK_BVvWc
- https://www.youtube.com/watch?v=s-tdy0c9L5w
- https://www.etsy.com/market/wood_slice_painting
- https://perfectingplaces.com/diy-spring-decor-how-to-make-wood-slice-spring-art/
- https://artistro.com/collections/wood-slices

- 11 Best Luxury Sandalwood Candles for 2026 - June 19, 2026
- 11 Best Woven Wicker Gift Baskets for 2026 - June 19, 2026
- 11 Best High Powered Binoculars for 2026 - June 19, 2026